The Classic Safety Razor - A 125 Year Old Design That Still Outperforms
- Bass Brushes

- Feb 7
- 21 min read


So, you're looking to get a better shave, huh? Maybe you've seen those classic razors and wondered what the fuss is about. Well, you've come to the right place. This guide is all about the safety razor, that classic tool that many people are returning to. It might seem a bit old-school, but trust me, once you get the hang of it, you'll wonder why you ever bothered with those multi-blade cartridges. We'll cover everything from picking out your first safety razor to keeping it in good shape.
Key Takeaways
A safety razor uses a single, sharp blade that cuts hair cleanly, often leading to less irritation than multi-blade cartridges.
Proper skin preparation, including warming and hydrating your face, is key to a smooth shave.
Mastering the angle and pressure is vital when using a safety razor; let the tool do the work.
Shaving with the grain first, then across or against if needed, helps minimize irritation.
Regular cleaning and proper storage will keep your safety razor in good condition for years.
Understanding Your Safety Razor
Welcome to the world of the safety razor, a tool that has stood the test of time for good reason. It’s not just about shaving; it’s about a more refined, comfortable, and effective way to groom. Let's break down what makes this classic tool so special.
The Anatomy of a Safety Razor
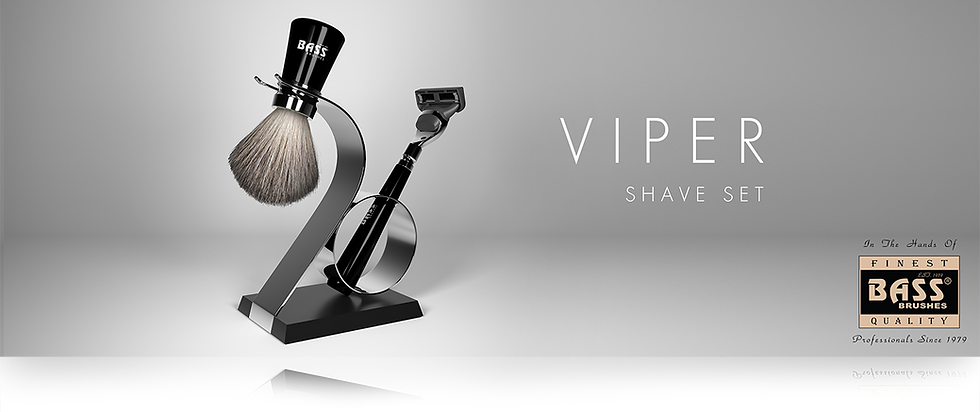
A safety razor might seem simple, but its design is quite clever. You've got a handle, which you hold, and a head. The head is where the magic happens. It has a top cap and a base plate, and these hold the actual razor blade in place. The way these parts are engineered dictates how the blade is exposed to your skin. The handle itself is designed for grip and balance, often featuring textures or patterns to keep it from slipping, even when wet. Some handles are heavier than others, and this weight plays a role in how the razor glides. The head's design also influences the angle at which the blade meets your skin, which is key for a close shave without irritation.
Choosing the Right Safety Razor
When you're picking out a safety razor, you'll notice a few differences. Some are made of premium alloys, giving them a satisfying weight and durability. Others might have a two-piece design, meaning the head separates into two parts for blade loading, which can make alignment a bit easier. Then there are three-piece razors, where the head comes apart into three sections. The handle design is also a factor; you'll find smooth ones, ribbed ones for grip, and some with a brushed finish for a sophisticated look. Ultimately, the best razor for you will feel balanced in your hand and suit your grip preference.
The Benefits of Double-Edge Shaving
Shaving with a double-edge (DE) safety razor offers a lot of advantages over other methods. For starters, it’s incredibly economical. You use standard DE blades, which are inexpensive and readily available. This also makes it a much more environmentally friendly choice, as you're not throwing away entire plastic razors. The design of a DE safety razor is engineered to provide a close shave with minimal irritation. Because you let the razor's weight do the work, you naturally apply less pressure, which is gentler on your skin. This can lead to fewer nicks, cuts, and less razor burn. Plus, the ritual of using a safety razor can be quite satisfying, turning a daily chore into a moment of mindful grooming.
Mastering the Art of Lather Creation
Creating a proper lather is more than just mixing soap and water; it's a foundational step that directly impacts the quality of your shave. A well-made lather acts as a lubricant, softens your facial hair, and lifts it away from the skin, allowing your safety razor to glide smoothly. Without it, you're essentially dragging a blade across dry skin, which is a recipe for irritation and nicks. Think of it as preparing the canvas before you paint – the better the prep, the better the final result.
The Science Behind a Proper Shave Lather
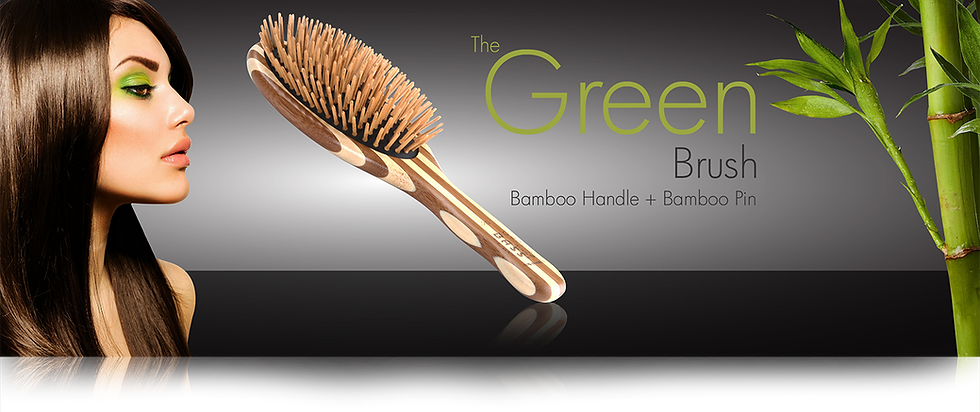
A good lather does a few key things. First, it hydrates your beard hair. When hair is wet, it swells up, making it softer and easier to cut. Second, it creates a slick barrier between your skin and the razor blade. This slickness is what allows the razor to glide without catching or pulling. Finally, a quality lather helps to lift the hairs, standing them up so they can be cut cleanly at the skin's surface. This is where using a brush, like those from Bass, really makes a difference. Brushes can work the lather deeper into your beard than your hands ever could, and they also provide a gentle exfoliation, removing dead skin cells that might otherwise interfere with a close shave.
Building Lather with Shaving Brushes
Using a shaving brush is a game-changer for lather creation. Whether you're using a badger or boar brush, the process is similar. Start by soaking your brush in warm water for a minute or two. This softens the bristles and helps them hold water, which is key for a rich lather. Then, swirl the brush over your shaving soap or cream. You're not trying to mash it in, but rather to gently pick up the product. Once you have some soap on the brush, start building the lather in a separate bowl or directly on your face. Use brisk, circular motions. As you work, you'll see the lather start to form. If it seems too thick or dry, add a little more warm water, a few drops at a time. If it's too thin, keep working it or add a bit more soap.
Soak your brush: Always start with a warm, wet brush. This is non-negotiable for good lather.
Load the brush: Gently swirl the brush on your soap or cream to pick up product.
Build the lather: Use circular motions in a bowl or on your face, adding water gradually.
Check consistency: Aim for a creamy, yogurt-like texture that holds its shape.
Achieving Optimal Lather Consistency
Getting the lather consistency just right takes a little practice. You're looking for something that's thick enough to provide cushion but slick enough to allow the razor to glide. Too much water, and your lather will be foamy and weak, offering little protection. Too little water, and it will be dry and pasty, making it hard to spread and not very slick. A good lather should look like soft whipped cream – it should hold peaks but still be smooth and spreadable. You should be able to turn the bowl upside down for a few seconds without the lather falling out, but it should still feel slick on your fingers. This perfect balance is what separates a good shave from a great one.
The goal is a lather that feels warm, slick, and stable. It should cushion your skin and allow the razor to cut the hair with minimal friction. This is achieved through the right ratio of water to soap and the effective use of your shaving brush to create that perfect texture.
Preparing Your Skin for a Superior Shave
Getting your skin ready before the razor even touches it is a big part of what makes a safety razor shave so good. It’s not just about the razor itself; it’s about setting the stage for a smooth, comfortable experience. Think of it like preparing a canvas before you paint – you want a clean, receptive surface.
The Importance of Skin Hydration and Heat
Warmth and moisture are your best friends when it comes to shaving. When your skin and facial hair are warm and hydrated, the hair softens up considerably. This makes it much easier for the blade to cut cleanly, reducing the tugging and pulling that can lead to irritation. Cold, dry hair is tough and resistant, making for a much less pleasant shave. A warm shower is ideal, but if that’s not an option, a warm washcloth applied to your face for a minute or two can do wonders. This simple step helps to open up your pores and relax your skin, making it more pliable and ready for the shave.
Pre-Shave Rituals for Enhanced Glide
Beyond just water and heat, there are a few extra steps you can take to really improve how your razor glides across your skin. Using a quality shaving brush, like those offered by Bass Brushes, is key here. A good badger brush, for instance, doesn't just build lather; it also helps to exfoliate your skin gently. This process lifts hairs away from the skin's surface and removes dead skin cells that could otherwise interfere with a smooth shave. The bristles work the lather deep into your stubble, ensuring every hair is coated and ready for cutting. This preparation is what helps prevent nicks and cuts, making the shave feel effortless.
A well-prepared face is the foundation of a great shave. It’s about softening the hair and creating a slick surface that allows the razor to glide with minimal resistance. This preparation is what separates a good shave from a truly superior one.
Mapping Your Shave Grain for Reduced Irritation
This is a step many people skip, but it makes a huge difference, especially if you have sensitive skin or are prone to ingrown hairs. Your facial hair doesn't all grow in the same direction. You need to figure out which way the hair is growing on different parts of your face – this is called shaving with the grain. You can do this by lightly running your hand over your stubble; you'll feel the direction that's smoother (with the grain) and the direction that feels rougher (against the grain). Shaving with the grain on your first pass is the gentlest way to remove hair. Going across or against the grain can give you a closer shave, but it also increases the risk of irritation and ingrown hairs. Knowing your grain pattern allows you to plan your passes strategically for the closest, most comfortable shave possible.
The Technique for a Close Safety Razor Shave
Achieving that perfectly smooth shave with a safety razor is all about technique. It’s not about brute force or speed; it’s about control, angle, and letting the tool do the work. Think of it as a dance between the razor, your skin, and the lather.
Grip and Angle for Optimal Blade Contact
How you hold the razor and the angle at which it meets your skin are probably the most important parts of the whole process. You want to hold the razor firmly but not too tightly. A good grip allows you to guide the razor smoothly. For most safety razors, you'll want to hold the handle towards the end, giving you better control over the head. The angle is key: aim for a shallow angle, typically around 30 degrees. You’ll know you’re close when you hear the hair being cut. Too steep an angle can lead to nicks, while too shallow might just skip over the hair. Experimentation is your best friend here to find that sweet spot.
Leveraging Razor Weight for Minimal Pressure
Safety razors, especially those made with quality metal, have a bit of heft to them. This weight is a feature, not a bug. You don't need to press down hard at all. In fact, pressing too hard is a common mistake that leads to irritation and cuts. Instead, let the weight of the razor do the cutting. Just guide it gently across your skin. Imagine you’re just lightly touching the surface; the blade will do the rest. This minimal pressure approach is what allows for a close shave without scraping your skin raw.
Executing Smooth, Controlled Strokes
When it comes to the actual strokes, think short, deliberate movements. You don't need long, sweeping passes. Short strokes give you more control, especially around tricky areas like your jawline or upper lip. Keep your strokes consistent and smooth. If you feel resistance or the razor snagging, stop, rinse the blade, re-lather if needed, and reassess your angle and pressure. It’s better to take a few extra strokes with proper technique than to rush and end up with irritation.
Here’s a quick guide to stroke execution:
Short Strokes: Aim for about an inch to an inch-and-a-half per stroke.
Consistent Angle: Maintain that 30-degree angle throughout each stroke.
Smooth Glide: Let the razor glide; don't push or pull.
Listen: Pay attention to the sound of the blade cutting hair.
Remember, the goal is to remove hair with minimal disruption to your skin. Patience and practice will refine your technique, turning a potentially daunting task into a satisfying part of your grooming routine.
Navigating Different Shaving Passes
After you've prepped your skin and built a good lather, it's time to actually shave. This isn't just about dragging a blade across your face; it's about understanding the direction your hair grows and how to work with it. Doing this right means a closer shave with less irritation. You'll typically do a few passes, and each one has a purpose.
The First Pass: Shaving With the Grain
This is your starting point. Shaving with the grain means you're moving the razor in the same direction your hair naturally grows. It's the gentlest way to remove stubble and is especially important if you have sensitive skin or are new to safety razors. You'll need to figure out which way your hair grows in different areas of your face. For most people, hair grows downwards on the cheeks and neck, and in different directions on the chin and jawline. Always start with a "with the grain" pass to minimize irritation.
Cheeks: Typically grow downwards.
Neck: Often grows upwards or downwards, requiring careful observation.
Jawline: Can grow downwards and slightly forwards.
Upper Lip: Usually grows downwards.
Subsequent Passes: Across or Against the Grain
Once you've completed your first pass with the grain, you can decide if you need a closer shave. This is where you'll do additional passes, moving the razor either across the grain (perpendicular to the direction of hair growth) or against the grain (opposite to the direction of hair growth).
Across the Grain: This pass offers a closer shave than the first pass. You'll move the razor perpendicular to the direction your hair grows. For example, if your hair grows down, you might shave sideways across your cheek.
Against the Grain: This is the most aggressive pass and will give you the closest shave possible. However, it also carries the highest risk of irritation, nicks, and ingrown hairs. Only attempt this pass if your skin can handle it and you've already done a "with the grain" and possibly an "across the grain" pass. You'll move the razor upwards on your neck or upwards on your cheeks if your hair grows downwards.
Techniques for Multi-Pass Shaving Without Irritation
Doing multiple passes is how you get that super smooth, barber-level shave, but you need to be smart about it. The key is to protect your skin between passes. If you're re-lathering for a second or third pass, make sure you use a good amount of lather. A quality shave brush, like those from Bass Brushes, helps build a thick, protective lather that acts as a cushion. Remember to rinse your razor frequently between strokes to keep it clear of hair and lather. If you feel any tugging or resistance, stop and re-lather or adjust your angle. It's better to have a slightly less close shave than to deal with razor burn.
Always reapply a generous amount of lather before each subsequent pass. This layer of protection is vital for allowing the razor to glide smoothly over your skin, reducing friction and the risk of nicks and irritation. A well-built lather from a quality brush is your best defense.
Blade Management and Replacement
Keeping your safety razor performing at its best means paying attention to the blade. It's the part that actually does the cutting, after all. A dull blade doesn't just give you a less-than-ideal shave; it can actually cause more irritation and tugging on your hair. Think of it like using a dull knife to chop vegetables – it's frustrating and messy. The same principle applies to your face.
Understanding Blade Sharpness and Hair Structure
Your facial hair has a specific structure, and how a blade interacts with it depends on its sharpness. When a blade is sharp, it cuts cleanly through the hair shaft. This results in a smooth finish and minimal drag. However, as a blade is used, its microscopic edge begins to wear down. This wear can cause the blade to bend or break the hair rather than cutting it cleanly. This is often when you start to feel that tugging sensation or notice increased irritation after a shave. The coarseness and density of your hair also play a role; thicker, coarser hair will dull a blade faster than finer hair.
When to Replace Your Safety Razor Blade
Figuring out the right time to swap out your blade is key to a consistently good shave. There's no single answer that fits everyone, as it really depends on a few factors. Your hair type, how often you shave, and even the specific blade you're using all contribute to how long a blade stays sharp.
Here's a general guideline:
For most users: Aim to replace your blade every 3 to 7 shaves. This range usually provides a good balance between sharpness and longevity.
If you notice tugging: This is a clear sign the blade is losing its edge. Don't push it; swap it out for a fresh one.
For sensitive skin: You might find that changing blades more frequently, perhaps every 2-3 shaves, helps minimize irritation.
Professional use: Barbers often change blades after each client to ensure the highest level of hygiene and sharpness. While this is more frequent than most personal users need, it highlights the importance of a fresh edge.
Ultimately, listen to your skin and your razor. If the shave starts feeling rough or you're experiencing more nicks than usual, it's probably time for a new blade.
Loading and Securing the Blade Safely
Changing a blade in your safety razor is a straightforward process, but it's important to do it carefully. Safety razors are designed to expose just the right amount of blade edge for a close shave while keeping most of the blade covered for safety. When you're changing the blade, you'll be handling the bare edge, so a little caution goes a long way.
Here’s how to do it safely:
Disassemble the Razor: Most safety razors have a two-piece or three-piece design. Unscrew the handle to separate the head components. For a two-piece, you'll typically unscrew the handle from the head, and the top cap will lift off. For a three-piece, the head will separate into three parts: the base plate, the top cap, and the handle.
Remove the Old Blade: Carefully lift the old blade away from the head. You can often just tip the head over, or use your fingers to gently lift it off the posts. Be mindful of the sharp edges.
Position the New Blade: Take a new double-edge blade and align it with the posts or guide on the head. Most heads have small pins or a specific shape that helps the blade sit correctly. Ensure the blade is seated properly before reassembling the razor.
Reassemble the Razor: Put the head components back together in the correct order and screw the handle back on. Tighten it until it's snug, but don't overtighten, as this can damage the threads or the head.
Always handle blades with care, and when in doubt, refer to the specific instructions for your particular safety razor model. A well-maintained razor with a fresh blade is the foundation of a superior shave.
Post-Shave Care for Optimal Skin Health
Rinsing and Patting Dry Techniques
After you've finished your final pass with the safety razor, it's time to give your skin some attention. Start by rinsing your face thoroughly with cool water. This helps to close your pores and remove any lingering soap residue or loose hairs. Don't use hot water here; cool is best for calming the skin. Once rinsed, resist the urge to rub your face dry with a towel. Instead, gently pat your skin dry with a clean, soft towel. This gentle approach prevents irritation and micro-tears that rubbing can cause, leaving your skin feeling refreshed and ready for the next step.
Applying Aftershave for Hydration and Comfort
Now that your skin is clean and gently dried, it's time to apply an aftershave product. This step is all about replenishing moisture and soothing the skin. You can opt for a balm or a lotion, depending on your preference and skin's needs. Gently massage the product into your skin. This not only helps it absorb but also provides a calming massage. A good aftershave will leave your skin feeling comfortable, hydrated, and protected, without any sticky residue. It’s the perfect way to cap off your shave.
Preventing Razor Burn and Ingrown Hairs
Post-shave care plays a big role in preventing common issues like razor burn and ingrown hairs. Proper rinsing and patting dry are the first lines of defense. Following up with a hydrating aftershave product also helps keep your skin healthy and less prone to irritation. If you're particularly susceptible to ingrown hairs, consider using a gentle exfoliant as part of your routine, perhaps a few times a week, to keep hair follicles clear. Consistent, proper post-shave care is key to a consistently smooth and comfortable shave.
The goal after shaving is to return your skin to a calm, hydrated state. This involves removing all traces of shaving cream, closing pores with cool water, and then providing a layer of moisture to protect the skin barrier. Skipping this step can leave your skin feeling tight, dry, and more vulnerable to irritation in the following days.
Adapting Your Safety Razor Technique
So, you've got the basics down with your safety razor, but what happens when your face throws you a curveball? Whether you've got skin that's a bit more sensitive, hair that's as tough as old boots, or you're just starting out, there are ways to tweak your approach. It's not a one-size-fits-all situation, and that's okay. Think of it like learning to ride a bike – you start on flat ground, then you learn to handle bumps and turns.
Shaving Sensitive Skin with a Safety Razor
If your skin tends to get red or irritated easily, the key is to be gentle. You want to minimize any friction. This means sticking to shaving with the grain for your primary pass. Don't be tempted to go against it if you can avoid it, especially when you're starting out. Using a softer badger brush, like those from Bass Brushes, can also make a difference. These brushes build a nice, cushiony lather that helps protect your skin. And remember, less pressure is more. Let the weight of the razor do the work.
Prioritize 'with the grain' passes. This is the gentlest way to cut hair.
Use a soft badger brush. A good brush helps create a protective lather.
Apply minimal pressure. Let the razor's weight guide your hand.
Consider a less aggressive blade. Some blades are sharper than others, and a milder option might be better for sensitive skin.
When your skin is sensitive, think of each stroke as a delicate dance. You're not trying to force anything; you're guiding the razor with care.
Managing Coarse or Curly Facial Hair
Now, if you've got hair that's thick, coarse, or curly, it can be a bit more challenging. The first step is making sure that hair is as soft as possible before the blade even touches it. A warm towel applied for a few minutes before you start can really help. Using a brush like a boar bristle from Bass Brushes can also be beneficial here. Boar bristles tend to be a bit firmer, which can help exfoliate the skin and lift those coarser hairs for a closer cut. Sometimes, a two-pass shave might be necessary to get everything smooth without causing irritation. Just be sure to re-lather between passes.
Warm towel prep is your friend. Soften that hair thoroughly.
Consider a boar bristle brush. They offer a bit more exfoliation.
Re-lather for subsequent passes. Always protect your skin.
Tips for Beginners Transitioning to Safety Razors
If you're new to safety razors, it's a bit of a learning curve, but totally doable. The biggest thing is to forget everything you know about cartridge razors. You don't need to press down hard. In fact, you shouldn't be pressing down hard at all. Hold the razor at a shallow angle, usually around 30 degrees, and let its weight do the cutting. Start with just one pass, shaving with the grain. As you get more comfortable, you can explore other passes. A good, balanced safety razor will feel natural in your hand, and using a quality shaving brush, like a Bass brush, will help you build a great lather that makes the whole process smoother. Take your time, be patient, and don't be afraid to experiment a little to find what works best for you.
Forget the pressure. Let the razor's weight do the work.
Master the angle. Around 30 degrees is a good starting point.
Start with one pass. Shave with the grain first.
Practice makes perfect. Don't get discouraged if your first few shaves aren't flawless.
Maintaining Your Safety Razor for Longevity
Taking care of your safety razor is pretty straightforward, but doing it right means it'll last you a really long time. Think of it like any good tool – a little attention goes a long way. You want to keep it clean and dry, and that's mostly it. It’s not complicated, but it’s important if you want that smooth shave day after day.
Rinsing and Drying After Each Use
After you finish shaving, the first thing you should do is rinse your razor thoroughly. Get all the soap and hair out from under the head and around the blade. For multi-piece razors, it’s a good idea to unscrew the handle and rinse all the parts separately. This stops any gunk from building up. Once it's clean, you need to dry it off. Use a soft towel to gently wipe down all the metal parts. Make sure to get into all the nooks and crannies to remove any moisture. Leaving water on it, especially in the threads or around the blade area, can lead to spots or even corrosion over time. It might seem like a small step, but it’s the most critical one for daily care.
Proper Storage to Prevent Corrosion
Where you keep your razor when it's not in use matters. You don't want to just toss it in a drawer or leave it sitting in a puddle of water on the sink. Ideally, you should store your safety razor in a dry, open-air spot. A razor stand is perfect for this. It keeps the razor upright, allows air to circulate around it, and prevents moisture from pooling. If you don't have a stand, just make sure it's placed somewhere it can air dry completely. Avoid storing it in humid places like a steamy bathroom cabinet. Keeping it dry is the best defense against rust and discoloration, preserving its look and function.
Deep Cleaning Your Safety Razor
While daily rinsing and drying are key, you'll want to give your razor a more thorough cleaning every so often. How often depends on how much you use it and the type of soap or cream you use, but every few weeks or months is a good general guideline. You can soak the metal parts in warm, soapy water for a bit. Then, use a soft brush, like an old toothbrush, to gently scrub any areas where buildup might have occurred, especially in the threads or around the guard. Avoid using any harsh cleaners or abrasive pads, as these can damage the plating or finish. After scrubbing, rinse everything well and dry it completely before putting it back together. This deep clean helps maintain the razor's performance and appearance over the years.
The Environmental Advantages of Safety Razors
Switching to a safety razor is a choice that benefits more than just your skin; it's a step towards a more sustainable grooming routine. You're likely aware of the growing concern over plastic waste, and the world of shaving is no exception. Traditional cartridge razors, with their disposable heads and plastic components, contribute significantly to this issue. A safety razor, on the other hand, offers a durable, long-term solution.
Reducing Waste Compared to Cartridge Systems
Think about the sheer volume of plastic and metal that ends up in landfills from disposable razors. Each cartridge, designed for a few uses, is discarded. With a safety razor, the handle is built to last for years, often a lifetime. The only part that needs regular replacement is the blade itself. These blades are small, made of metal, and far more manageable in terms of waste.
Durable Handle: Your safety razor handle is an investment, designed for longevity.
Minimal Blade Waste: Only the thin metal blade is replaced, not an entire plastic cartridge.
Recyclable Blades: Metal blades can often be recycled, further reducing their environmental impact.
The Eco-Conscious Nature of Metal Blades
Safety razor blades are typically made from stainless steel. This material is not only effective for a close shave but also recyclable. Unlike the complex multi-material construction of cartridge heads, which can be difficult to separate and recycle, a simple metal blade presents a much cleaner end-of-life scenario. When you consider the thousands of plastic cartridges that might be avoided over the years by using a single safety razor, the environmental benefit becomes quite clear. It’s a simple swap that makes a big difference.
Choosing a safety razor means opting for a tool that is designed to last, moving away from the disposable culture that has become so prevalent. This shift aligns with a broader movement towards mindful consumption and a desire to lessen our impact on the planet.
Choosing Sustainable Grooming Practices
Embracing a safety razor is part of a larger commitment to sustainable grooming. It encourages you to think about the materials you use and their lifecycle. When paired with a quality shaving brush, like those from Bass Brushes, you create a system that prioritizes durability and reduces waste. A natural bristle brush, for instance, is also a long-lasting tool, often made with sustainable materials, further complementing your eco-conscious approach to shaving. It’s about making deliberate choices that align with environmental responsibility, transforming a daily routine into an act of mindful stewardship.
Your Path to a Superior Shave
So there you have it. You've learned the ins and outs of using a safety razor, from holding it just right to letting its weight do the work. It might feel a little different at first, maybe even a bit awkward, but stick with it. Remember to keep that angle shallow, apply barely any pressure, and always shave with the grain to start. Rinse your blade often, and don't forget that cool water and a good balm afterward. It’s not just about getting rid of hair; it’s about taking a moment for yourself, doing it right, and feeling that smooth skin. Keep practicing, and you’ll see the difference. You’ve got this.
Frequently Asked Questions
Why should I switch to a safety razor?
Switching to a safety razor can give you a closer shave with less irritation. These razors are designed to use the weight of the handle to do the work, meaning you don't have to press down hard. Plus, they create way less waste than those plastic cartridge razors, which is great for the planet.
Is a safety razor hard to use for the first time?
It might take a little practice, but safety razors aren't too difficult to learn. The key is to hold the razor at a shallow angle, about 30 degrees, and let its weight guide your strokes. Don't push down; just let the blade do its job. You'll get the hang of it quickly!
How do I create a good lather for shaving?
Making a good lather is important! Use a shaving brush to swirl soap or cream in a bowl or on your face until you get a rich, creamy foam. You want it to be thick enough to cushion your skin and help the razor glide smoothly. Adding a little water at a time usually does the trick.
How often should I change the blade in my safety razor?
You should change your blade pretty often to keep your shaves smooth and irritation-free. For most people, a new blade works best for about 3 to 7 shaves. If you notice the shave isn't as close or feels a bit rough, it's probably time for a fresh blade.
What's the best way to prepare my skin before shaving?
To get your skin ready, wash your face with warm water to soften your hair and open up your pores. You can also use a warm towel for a minute or two. This makes shaving much easier and helps prevent irritation.
How do I avoid razor burn and ingrown hairs?
To avoid razor burn and ingrown hairs, always shave with the direction your hair grows, especially if you have sensitive skin or curly hair. Make sure you're using a sharp blade and plenty of lather. After shaving, rinse with cool water and pat your skin dry gently, then apply a soothing aftershave.
Can I use a safety razor on sensitive skin?
Yes, you absolutely can! Safety razors are often better for sensitive skin because they require less pressure and create less drag. Just be sure to shave with the grain and use a good quality lather and a fresh blade.
How do I take care of my safety razor?
Taking care of your safety razor is simple. After each shave, rinse it thoroughly under warm water to get rid of any leftover soap or hair. Then, dry it off completely with a soft towel. Store it in a dry place, not in a steamy bathroom, to prevent rust.